This is the first in a series of design tips that we hope will enhance the security design of your projects, and help you deliver more value to your clients.
The camera imager size (2 MP, 4 MP, 5 MP, etc.) and lens focal length should always align with the viewing requirements, to ensure performance and cost are not negatively impacted.
The hardware selected should be capable of delivering the desired imaging results to achieve operational requirements. It is important to understand and document the operational requirements and desired performance, for each camera in the design. If the actual performance requirements for the cameras are not accurately understood, there may be a tendency to over-specify and increase cost.
To illustrate, let’s say you have a project with 400 cameras. Let’s say that the operational requirement for 200 of those cameras is only 2 MP, but they are specified as 5 MP instead. Specifying those 200 cameras with the higher pixel density unnecessarily increases the cost by as much as $30,000.
Not only will the cost be impacted, but the file storage needs will also be increased. In terms of data storage, 5 MP takes up 2.5 times more disk space, which can cost in the range of $1,500 per 8 TB of additional RAID 6 disk space. While the Video Management System (VMS) software may allow images to be scaled down from 5 MP to 2 MP to avoid issues with file storage capacity, standardizing the imager size would not only allow for reduced spares but also provide future flexibility. So in light of the additional cost this needs to be carefully considered.
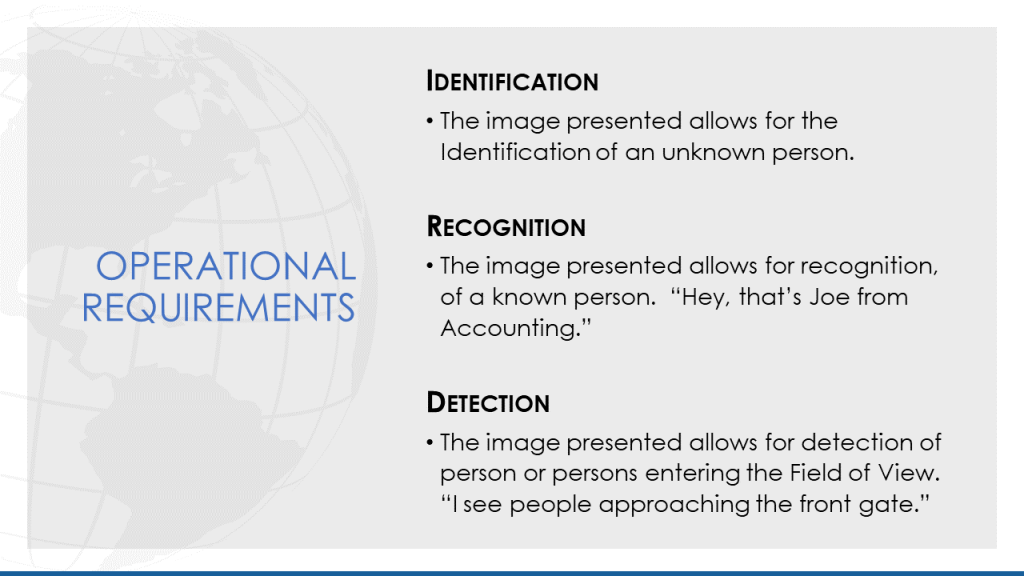
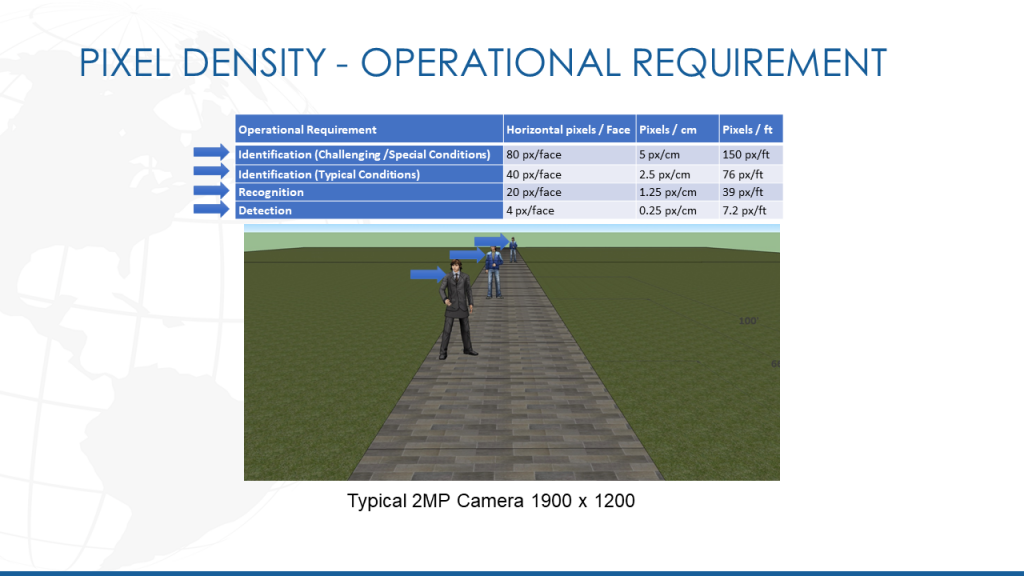
How do operational requirements (i.e. identification, recognition and detection) translate to pixel density and imager selection? Simply put, the more detail needed, the more pixels required. If your requirement is simply to detect a person entering the field of view, then an imager with low pixel density is sufficient. However, if facial recognition is needed or lighting conditions are poor, then a more robust number of pixels are needed on the target. The image below simulates the display of a typical 2 MP camera viewing 3 subjects at varying distances.
For each Operational Area we must specify the requirement. As a best practice, we should also consider the lighting in the area. Will IR illuminators be required? Are there environmental motion controls to turn on the lights? Is surveillance required 24 x 7?
In the examples below, I used Sketchup as my 3D drawing tool with the Axis Camera extension. (This functionality is also available in the Axis REVIT families.)
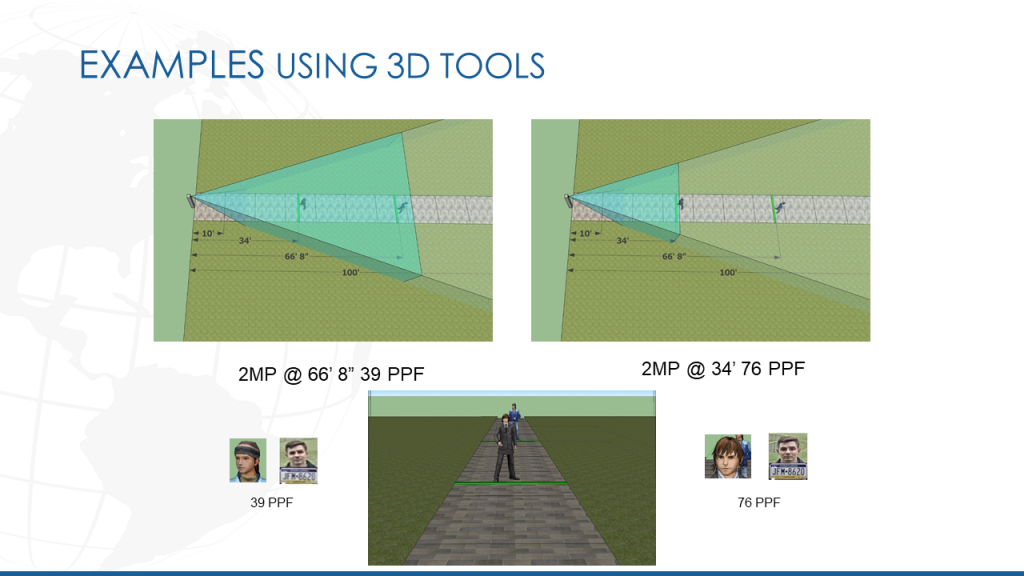
In the first example, the 2 MP camera has its properties set to show the shaded field of view area in which we have a density of 39 PPF. This extends out to approximately 66′ 8″. The image below that shows the simulated image. The image to the left shows a sample image of the quality seen if we were to digitally zoom on to the head of the subject. The second example shows the same camera with its properties set to display the FOV @ 76 PPF. This extends out to about 34′. Then, below to the right, is an example of image quality at this pixel density.
So, you can see how aligning the operational requirements with the pixel density and focal length, can improve both cost and performance. In the next Design Tip video, I’ll do a deeper dive into using REVIT and Sketchup, and the 3D tools available to aid in the design and validate the performance.
Great article!